The Best Photography Spots in Sedona
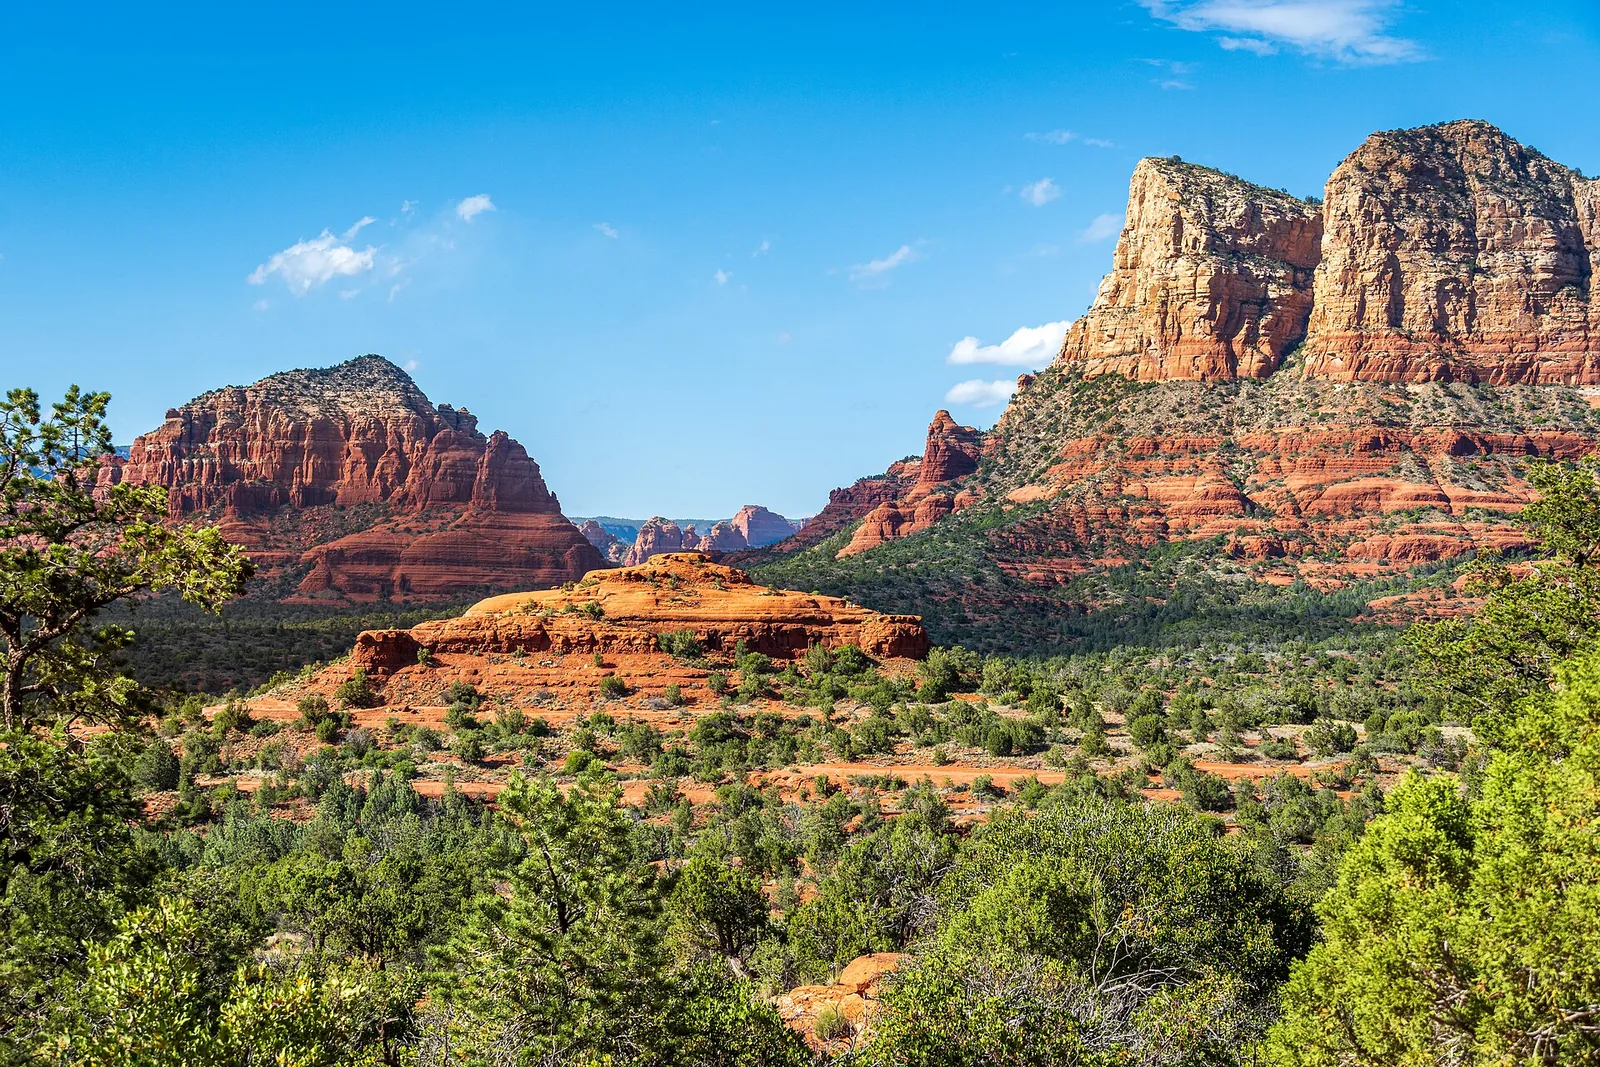
Sedona is one of those rare places where pointing your camera in almost any direction gets you a keeper. The red sandstone glows when the light is low, the contrast against a deep blue sky is unreal, and at night the Milky Way arcs right over the rocks because the whole town is a certified dark-sky community. The catch is that everyone else knows this too, so the famous spots get busy, the parking fills early, and the best light lasts about twenty minutes. This guide walks you through where to shoot, when to be there, and how to get the photo without fighting a crowd.
The light is the whole game
Before we get into specific locations, understand the one thing that separates a flat snapshot from a great Sedona photo: timing. The red rocks look ordinary under harsh midday sun. They come alive in the hour after sunrise and the hour before sunset, when low-angle light makes the iron in the sandstone glow.
Here’s the rough timing to plan around. These are general windows, not exact times, so check a sunrise/sunset app for the day you’re shooting.
| Light window | When it happens | What it’s good for |
|---|---|---|
| Blue hour (morning) | ~30 min before sunrise | Soft, cool light; calm creek water; almost no crowds |
| Golden hour (morning) | First hour after sunrise | Warm glow on east-facing rocks; long shadows |
| Midday | ~10 a.m. to 4 p.m. | Harsh and flat; best for hiking, not photos |
| Golden hour (evening) | Last hour before sunset | The classic warm Sedona glow; busiest window |
| Blue hour (evening) | ~30 min after sunset | Pastel sky, deepening rocks; town lights start |
| Astro / Milky Way | New moon, ~2 hrs after dark | Stars and the galactic core over the rocks |
A few rocks face east and shine at sunrise (Cathedral Rock from Red Rock Crossing); others face west and light up at sunset (Bell Rock, the view from Airport Mesa). Knowing which way a formation faces tells you whether to set your alarm for dawn or plan a late afternoon. The single best habit you can build here is to be in position before the light arrives, not scrambling for a parking spot while it’s happening.
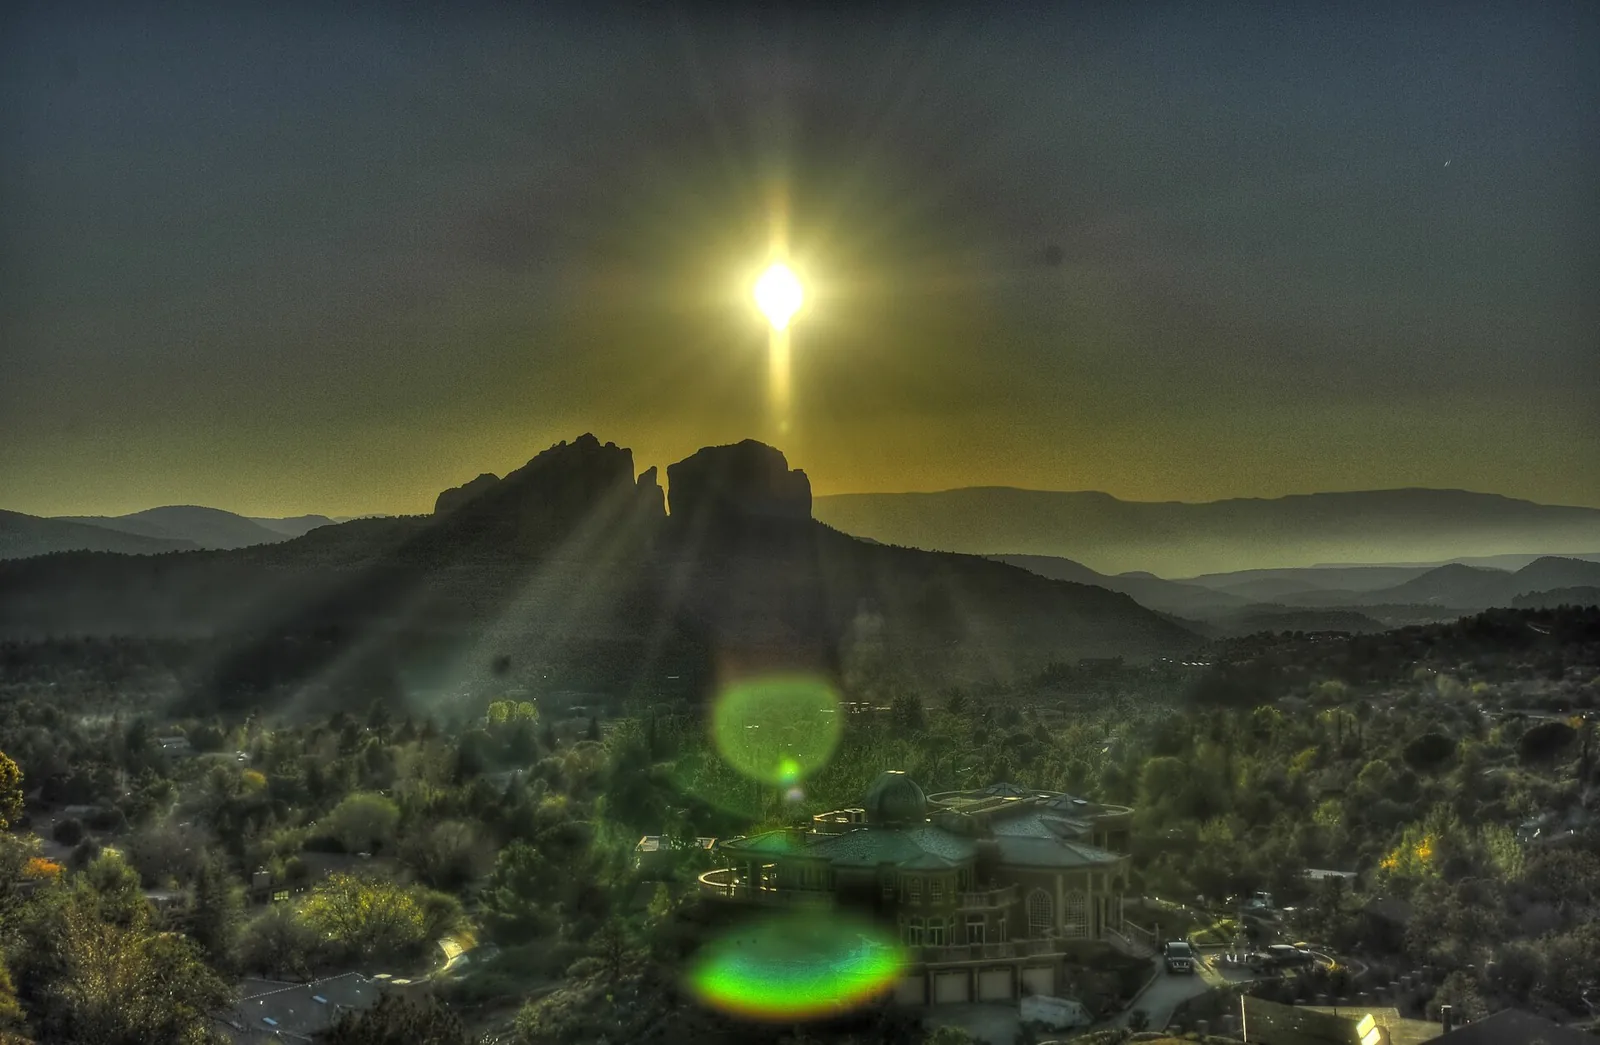
Local tip: Sedona’s “second sunset” is real and underrated. After the sun drops, don’t pack up. For ten or fifteen minutes the rocks keep a soft pink-purple cast while the sky goes pastel blue. Some of the calmest, most atmospheric frames happen after most people have already left.
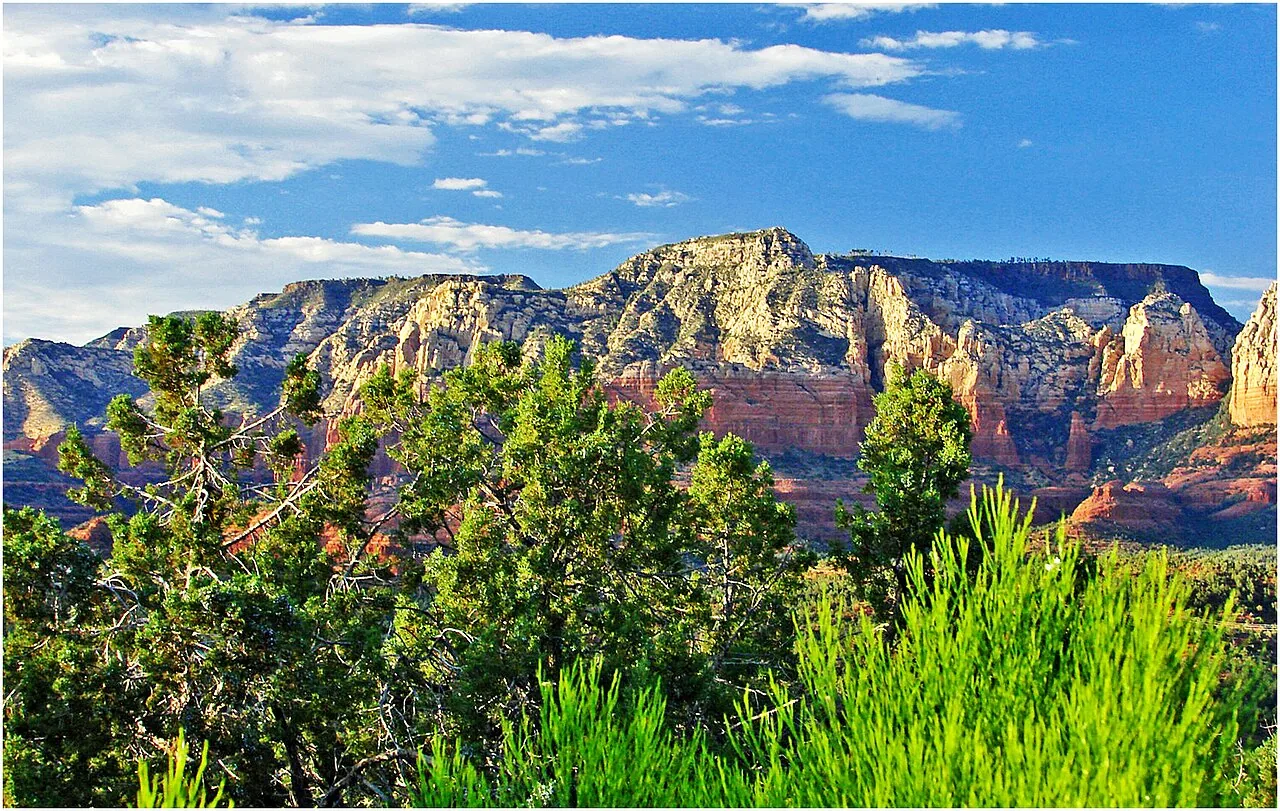
Red Rock Crossing — the most photographed view in Arizona
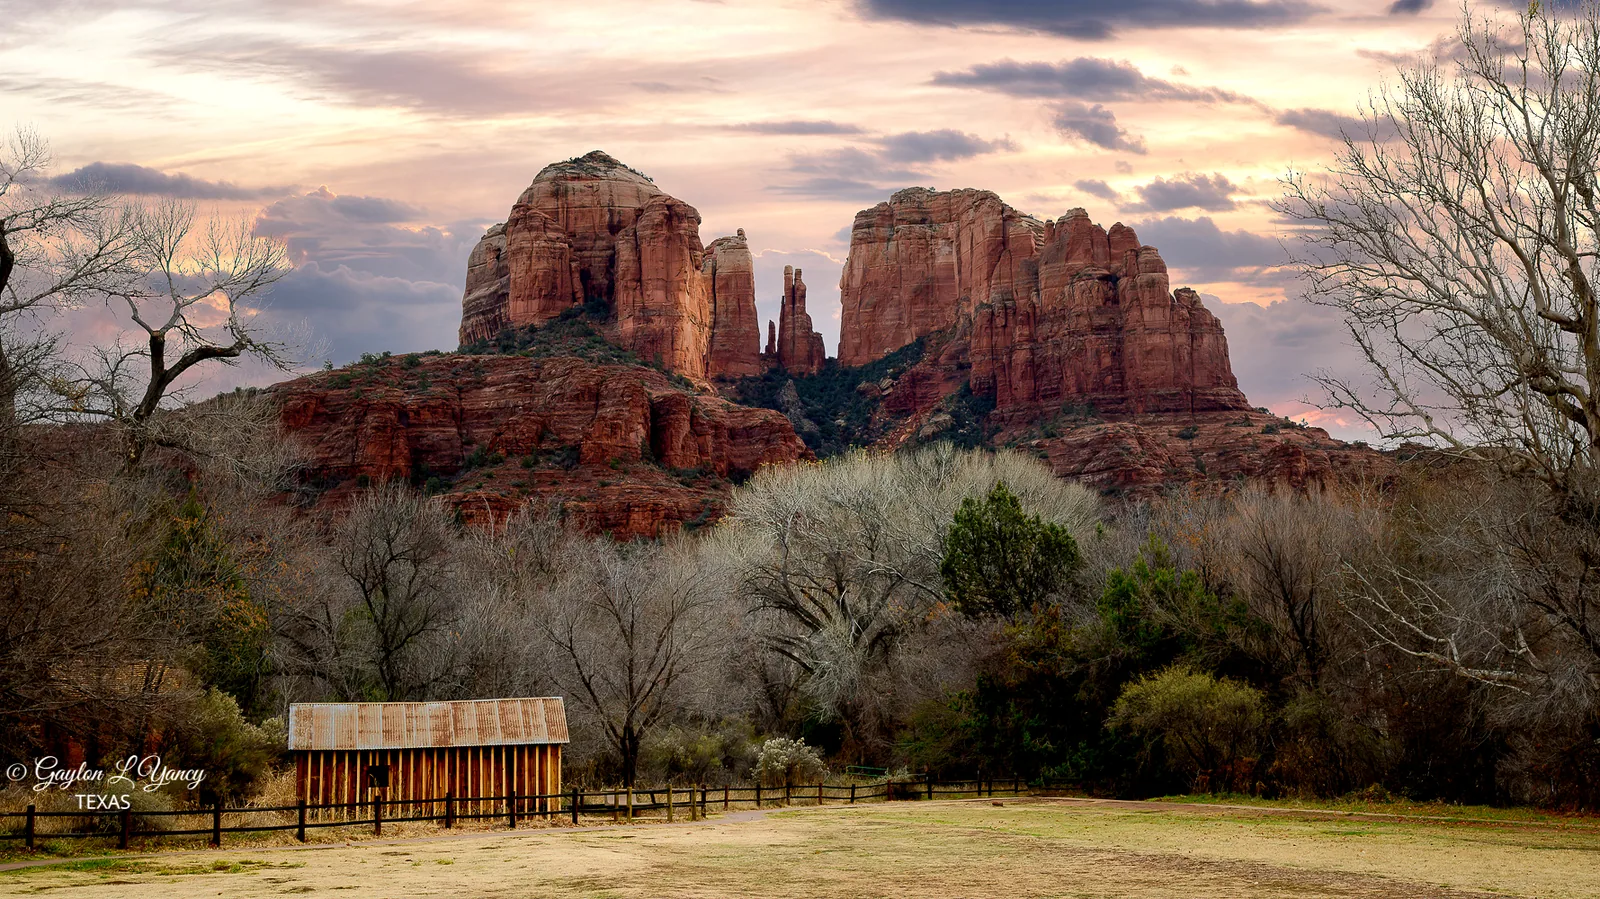
If you only shoot one spot, make it this one. The view of Cathedral Rock reflected in Oak Creek from Red Rock Crossing is, by reputation, the most photographed scene in Arizona, and it earns it. The twin spires rise straight up behind a slow bend in the creek, and on a still morning you get a near-perfect mirror image in the water.
Getting there and the fee
The easiest access is through the Crescent Moon Recreation Area (also called Crescent Moon Ranch), off Chavez Ranch Road. Important detail that trips up a lot of visitors: this is a separate fee site. The standard Red Rock Pass does not work here, and neither does the America the Beautiful pass. There’s a per-vehicle day-use fee (recently around $11, but confirm the current rate before you go), collected at the entrance station. Bring cash, as card acceptance has been unreliable.
From the parking area it’s a short, flat walk on paved and dirt paths to the creek. The whole area has over a mile of easy walking paths along the water, so you can scout several angles of Cathedral Rock without much effort.
Best time and what to expect
- Best light: Cathedral Rock faces roughly east-northeast from here, so it lights up at sunrise and stays warm through the morning. Sunset works too, but the rock itself falls into shadow earlier.
- For the reflection: You need still water, which means early morning before the wind picks up. Late summer and fall, when Oak Creek runs lower and calmer, tend to give the cleanest mirror.
- Crowds: This is photographer central, especially at sunrise. Show up 30–45 minutes early to claim a spot. The gate opens early but hours shift seasonally, so check ahead.
Two other access points
If Crescent Moon is full or you’d rather skip the fee, you can reach the same stretch of creek from the Baldwin Trail or the Secret Slick Rock (Templeton) area, both of which use a regular Red Rock Pass. These add a longer walk but give you slightly different, less-crowded angles on the same rock. For more on the formation itself, see our Cathedral Rock guide.
Chapel of the Holy Cross
The Chapel of the Holy Cross is a modernist church built right into a red rock spur, and it photographs beautifully from two directions: looking up at the chapel framed by the rocks, and looking out from the chapel terrace across the valley toward Bell Rock and Courthouse Butte.
- Address: 780 Chapel Road, off Highway 179 about four miles south of the “Y” (the 89A/179 junction in town).
- Hours and cost: Generally open daily, roughly 9 a.m. to 5 p.m., with free admission (donations support upkeep). Hours can change and it closes on a couple of holidays, so confirm before visiting.
- Parking: This is the hard part. There are only around 45 spaces and they fill fast. Go early morning or late afternoon, and be patient; a parking attendant often directs the line.
For photos, the warm afternoon light hitting the west-facing chapel and rocks is gorgeous. The view from the upper terrace at sunset, looking out over the valley, is one of the best easy-access vistas in Sedona. It’s also genuinely accessible: a paved (if steep) ramp leads up to the chapel, so you don’t need to hike. You can read more in our Chapel of the Holy Cross guide.
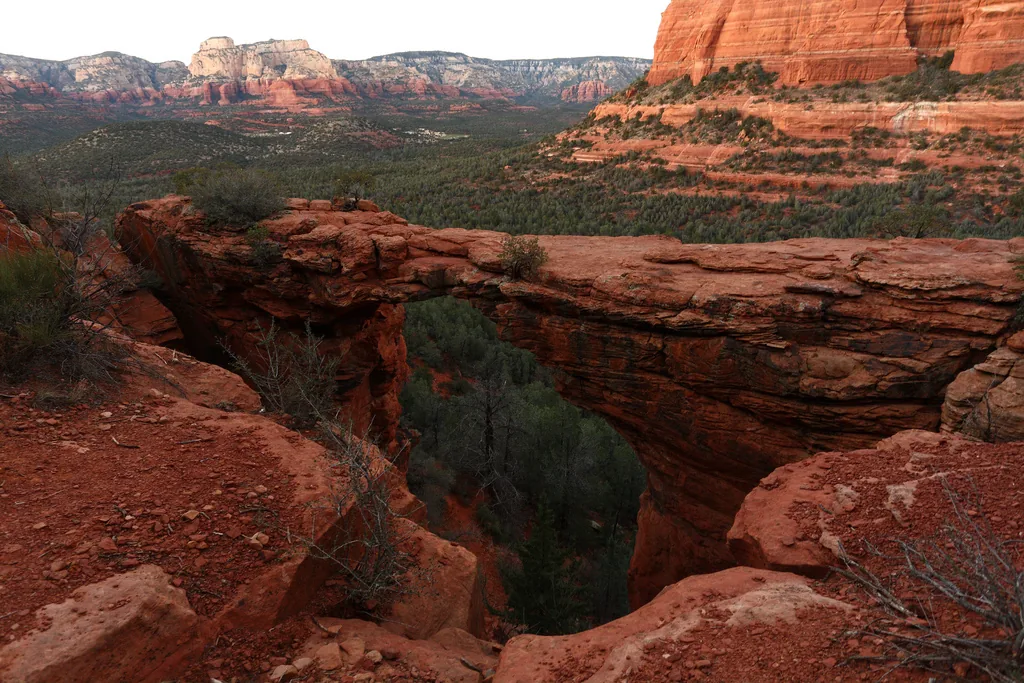
Devil’s Bridge — the iconic arch shot
Devil’s Bridge is the largest natural sandstone arch in the Sedona area, and the photo of someone standing on top of it is one of the most recognizable images of the region. Getting that shot takes some effort and some patience.
The hike and how you get there
Distances depend entirely on where you start:
- From the Dry Creek Road paved lot: roughly 4 to 4.6 miles round trip. This is the most common route on foot.
- From the Mescal Trailhead: a similar distance, often described as a slightly more scenic and gentler approach.
- From the high-clearance 4WD lot at the end of Dry Creek Road: about 1.6 miles round trip with a few hundred feet of climbing. You need a real high-clearance vehicle for that rough road; don’t attempt it in a rental sedan.
A Red Rock Pass (or America the Beautiful pass) is required to park at the trailheads. The paved Dry Creek lot fills before 7 a.m. on busy days. The smartest option for most people is the free Sedona Shuttle, which runs to the Dry Creek Vista and Mescal trailheads on a seasonal schedule (typically Thursday–Sunday, expanded during spring break and holidays). It removes the parking gamble entirely.
Getting the shot without the line
Here’s the honest part: there is almost always a line to stand on the arch, sometimes 30 minutes to over an hour at midday. To beat it, hike up to reach the bridge near sunrise. You’ll get softer light, a thinner crowd, and a shorter wait. Bring a wide lens to capture the full span, and remember the most dramatic “standing on the bridge” shot is taken by a second person from the side viewpoint, not by the person on the arch. Our full Devil’s Bridge guide covers the route in detail.
Airport Mesa — the sunset panorama
Airport Mesa (sometimes called Table Top Mountain) sits on a high ridge with a 360-ish-degree view over town and the surrounding rocks. It’s the go-to sunset spot because you can watch the light fade across Thunder Mountain, Coffee Pot Rock, and Capitol Butte all at once.
Two different spots up there
People mix these up, so here’s the distinction:
- The Airport Saddle / Airport Mesa Vortex: A small free parking pullout partway up Airport Road, with a short scramble to a knoll. This is also a known vortex site. Parking is tiny and fills fast.
- The Airport Scenic Overlook (Airport Vista): A larger paved lot near the top with a modest parking fee (recently around $3, pay station on site). Bigger, more reliable, and a wide-open view.
For a proper hike with constantly changing angles, the Airport Loop Trail circles the whole mesa, about 3.3 miles with a few hundred feet of gain, rated moderate. See our Airport Mesa Loop guide for that route.
Sunset reality check
The overlook gets crowded at sunset, full lot, people lined along the rail. It’s still worth it, but if you want elbow room, walk a few minutes out onto the loop trail away from the lot and you’ll have a quieter spot with the same light. Bring a jacket; the wind picks up after the sun drops, even in summer.
Bell Rock and Courthouse Butte
Down in the Village of Oak Creek, Bell Rock is one of the most photogenic and easiest-to-reach formations in Sedona. It’s a smooth, bell-shaped dome that catches warm light beautifully in late afternoon, with Courthouse Butte right behind it.
- Parking: Use the Bell Rock or Courthouse Vista trailheads off Highway 179. A Red Rock Pass is required. If the main lot is full, try the Yavapai Vista lot just north.
- The shot: Both rocks face generally west, so late afternoon and sunset light them up. You can shoot a strong frame from the parking area or the flat lower Bell Rock Pathway without any real hiking.
- Difficulty: As easy or hard as you want. The Bell Rock Pathway is mostly flat and family-friendly; scrambling up Bell Rock itself is steep and exposed.
This is a great spot to pair with stargazing later, since you’re away from town lights. Our Bell Rock guide has the full breakdown.
Snoopy Rock
Look toward the eastern skyline from town and you’ll spot a formation that, from the right angle, looks exactly like Snoopy lying on his back on top of his doghouse. It’s a fun, easy one to bag.
- Easiest view, no hike: You can see Snoopy Rock from several spots around Uptown Sedona and from along Schnebly Hill Road. Just pull over safely at a viewpoint.
- For the close hike: Take the connector from the Sombart Lane Trailhead to Marg’s Draw Trail (a Red Rock Pass is needed to park). It’s a short, moderate walk to a clear view of the formation, with Uptown, Oak Creek Canyon, and Thunder Mountain behind it.
- Best light: Snoopy faces west, so it reads best in afternoon and at sunset when the silhouette stands out against the sky.
A telephoto lens helps here to isolate the “Snoopy” shape from the surrounding cliffs.
Schnebly Hill Road — the dirt-road overlook
For a high vista that most tourists skip, Schnebly Hill Road climbs from the edge of town up toward the Mogollon Rim. The lower stretch is a rough, washboarded dirt road. The payoff is the Schnebly Hill Vista near the top and stops like Merry-Go-Round Rock along the way, with sweeping views back down over the red rock country.
- Vehicle: You need a high-clearance vehicle, ideally 4WD, especially past the first mile. This is not a road for a standard rental car. If you don’t have the right vehicle, a guided Jeep tour is the smart way to see it, and the drivers know exactly where to stop for photos.
- Seasonal closures: Upper sections close in winter (roughly December through April) and after storms. Always check the Coconino National Forest road status before heading up.
- Why it’s worth it: Far fewer people, big elevated views, and great late-afternoon light on the canyon below.
Cathedral Rock at sunset
We covered Cathedral Rock’s sunrise reflection at Red Rock Crossing, but the formation deserves its own sunset mention because the two are completely different photos. At sunset, the classic move is to shoot Cathedral Rock head-on as the west-facing spires catch fire in the last light.
- Where: The viewpoints along Back O’ Beyond Road and the area near the Cathedral Rock Trailhead (Red Rock Pass required, or take the free Sedona Shuttle, since this lot is notoriously small and fills early). Lower stretches of the Bell Rock Pathway and Templeton Trail also give clean sightlines.
- For the silhouette: If you stay through blue hour, Cathedral Rock becomes a dramatic dark shape against a glowing sky, which is a stronger image than the literal rock-on-fire shot many people chase.
See our dedicated Cathedral Rock guide and the sunset spots roundup for more locations.
Night photography and the Milky Way
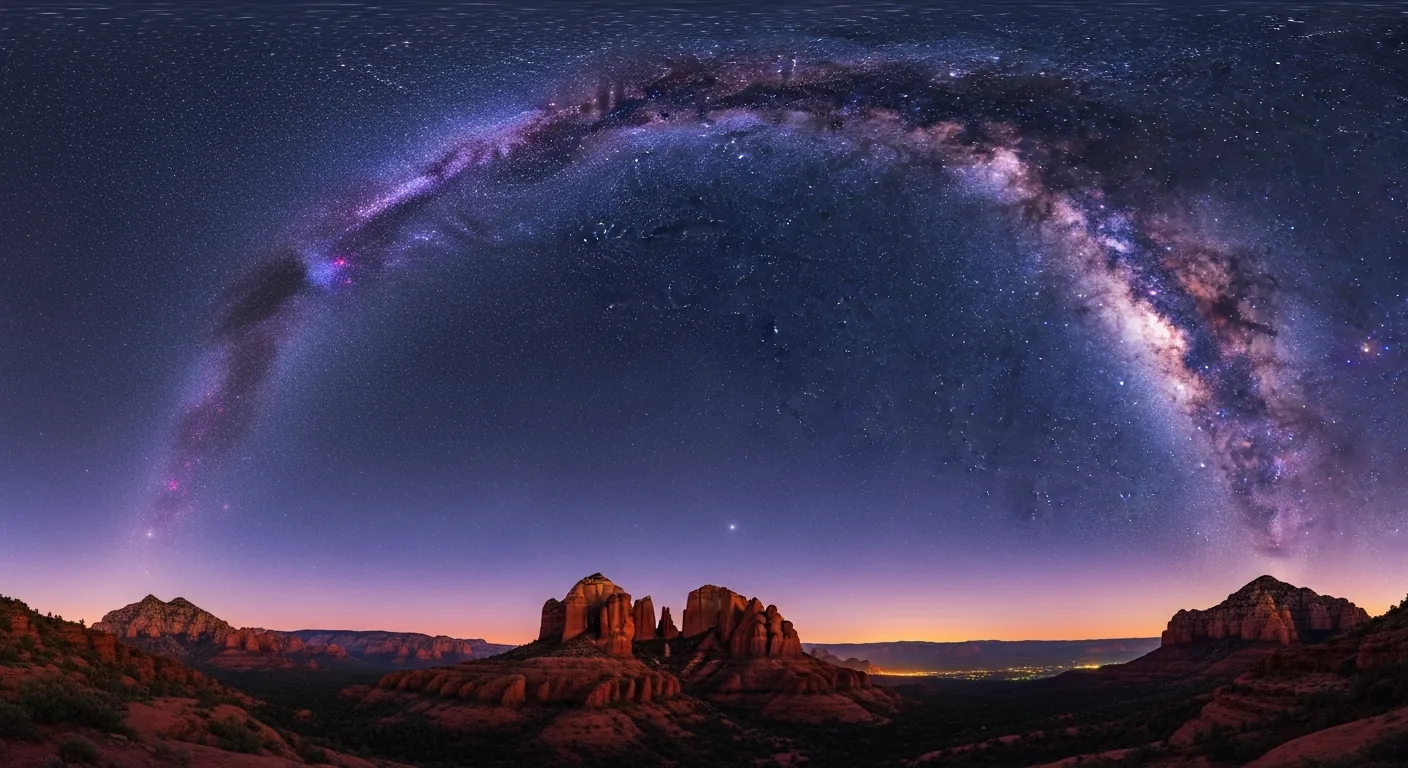
Sedona was certified as an International Dark Sky Community in 2014, which means the town actively limits light pollution. The result is a night sky most cities can’t offer, and it makes Sedona a genuinely great place for astrophotography.
When to shoot the stars
- Galactic core season: The bright center of the Milky Way is visible roughly February through October, riding highest and brightest from about June into October.
- Avoid the monsoon: July and August bring afternoon and evening storms (the southwestern monsoon). Clear nights are less reliable then.
- Chase the new moon: Plan your astro night within a few days of the new moon. A bright moon washes out the stars completely. Check a moon-phase calendar before locking in a date.
- Timing: Once it’s fully dark (roughly two hours after sunset), the core climbs into view to the south/southeast.
Where to point the camera
You want a dark spot away from town lights with an interesting rock in the foreground. Bell Rock, the open areas around the Village of Oak Creek, and pullouts along the Red Rock Scenic Byway all work well. For a deeper look at dark-sky spots, see our stargazing guide.
Astro gear and settings
A phone in night mode can capture a surprising amount now, but for a real Milky Way shot you’ll want:
- A camera that shoots manual with a wide, fast lens (f/2.8 or faster helps a lot).
- A sturdy tripod, this is non-negotiable for long exposures.
- A remote shutter or the camera’s 2-second timer to avoid shake.
- A red-light headlamp so you can see without ruining your (or anyone else’s) night vision.
- Warm layers. Desert nights get cold fast, even after hot days.
A reasonable starting point: ISO 3200–6400, aperture wide open, shutter around 15–20 seconds, and manual focus set to the stars. Take a test frame and adjust from there.
Gear, etiquette, and Leave No Trace
What to pack for a photo day
- A tripod for sunrise, sunset reflections, and any night work.
- A wide lens for sweeping vistas (Devil’s Bridge, Airport Mesa) and a telephoto to isolate formations like Snoopy Rock.
- A polarizing filter to deepen the blue sky and cut glare off Oak Creek.
- Plenty of water, more than you think; Sedona is high desert and dehydration sneaks up on you.
- Sun protection and sturdy shoes for the slickrock.
- A headlamp if you’re shooting at the edges of the day, which you should be.
Drone rules — read this before you fly
Drone rules in the Sedona area are strict, and the fines are real:
- Drones are banned in designated wilderness areas, which includes the Red Rock–Secret Mountain Wilderness and Munds Mountain Wilderness, so most of the iconic backcountry spots (including the area around Devil’s Bridge) are off-limits.
- They’re not allowed in Arizona State Parks such as Red Rock State Park or Slide Rock.
- Sedona has a towered airport (Airport Mesa), so you can’t fly within five miles of it without authorization, which covers most of the town.
- Where flight is permitted on general Coconino National Forest land, you must keep the drone within sight, below 400 feet, and clear of temporary flight restrictions.
The short version: assume you can’t fly at the famous spots, and check the specific rules for any area before you launch.
Etiquette and Leave No Trace
These places stay beautiful because people take care of them. A few simple rules:
- Stay on established trails. The crust and plant life off-trail take years to recover from footprints, and social trails scar the landscape.
- Don’t stack rocks (cairns) for photos. It misleads other hikers and disturbs the ground.
- Wait your turn at popular spots like Devil’s Bridge. Don’t crowd someone mid-shot, and don’t camp on the arch for 20 minutes of selfies when there’s a line.
- Pack out everything, including fruit peels and the little tabs from gear.
- Keep noise down, especially at sunrise and during astro sessions; you’re sharing the quiet.
- Don’t trespass for an angle. Plenty of great frames exist from legal, established viewpoints.
How to plan a photo-first day
If you want to maximize good light, work the day like this:
- Pre-dawn: Be at Red Rock Crossing for the Cathedral Rock reflection before the sun and the wind arrive.
- Morning: Hike Devil’s Bridge early (or take the shuttle) while the crowd is thin and the light is soft.
- Midday: This is bad photo light, so use it for lunch, a gallery in Tlaquepaque, or a rest. Honestly, midday is a great time to head back, cool off, and get a few games in on the indoor court before the evening shoot.
- Late afternoon: Position at Bell Rock, the Chapel terrace, or Airport Mesa for golden hour.
- After sunset: Stay for blue hour, then, if it’s near a new moon, drive out to a dark pullout for the Milky Way.
Don’t try to cram every location into one day. The best Sedona photos come from picking one or two spots per light window and actually being there when it happens, rather than racing around and missing the light at all of them. If you’re planning your whole trip, our 3-day itinerary helps you spread these out sensibly.
Whatever you shoot, the formula is the same: get there early, respect the place, and let the low light do the heavy lifting. The rocks have been glowing here for a very long time, and they’ll do it again tomorrow if you miss it today. When you’ve got the shots you came for, stay at Pickler House gives you a quiet, comfortable base, and a court of your own, to come back to between sunrise and sunset.
Frequently asked questions
What is the most photographed spot in Sedona?
Do I need a permit or pass to photograph Sedona's red rocks?
When is the best time of day to photograph Sedona?
Can I fly a drone for photos in Sedona?
When can I photograph the Milky Way in Sedona?
How do I avoid crowds at the popular photo spots?
Stay where you can rally any season
Sedona Pickler is a private West Sedona vacation home with its own indoor, climate-controlled pickleball court — a short drive from the trailheads, viewpoints and restaurants in this Sedona guide. Play at sunrise or after dark, in any weather.
Check availability on Airbnb